Time for an overhaul of my 1.9 '98 BMW Z3 Individual

Matt Barnes

Zorg Guru (III)
Supporter
British Zeds
Joined
Jul 18, 2020
Points
128
Location
Portchester, Fareham
Model of Z
1998 BMW Z3 Individual 1.9 M44 B19

Matt Barnes

Zorg Guru (III)
Supporter
British Zeds
Joined
Jul 18, 2020
Points
128
Location
Portchester, Fareham
Model of Z
1998 BMW Z3 Individual 1.9 M44 B19
Well I know it's been few and far between, but nice actually having a dry day to get cracking. First thing to address was that rotten cross brace.
We'll talk about the oil leaks later ! =))

1772890436050.png


Comparing against the new powder coated one!

1772890508351.png
1772890545235.png


I was just about to redo the offside brake pipe with an inline Union, then stopped myself as I only have vice mounted flaring tool and I don't think I'd get enough torque using it hand held, so bottled it

1772890701525.png


so, ordered me one of these which I know a few of you have used, so I'll have another go when I get that..

1772890767536.png


soooo about that leak :whistle:

1772890837795.png


Thinking on the plus side, it stops things from rusting !.... so with my good friends Gunk and brake cleaner I set to work.

1772890919131.png


subframe and steering rack came up really nicely. Especially those power steering labels !

1772891123013.png


I was tempted to put the new brace on, but I'm sure I'll find some more to clean under there...

so turning to the upper side, the engine bay is really letting the side down. Whole thing needs a really good tidy up.

Started with the strut towers

1772891397764.png
1772891419367.png


got the angle grinder onto the rusty areas back to bare metal, then it was a dose of Kurust

1772891485081.png
1772891503368.png


I'll let that do it's thing, then it's a couple of coats of Tristar Color Fiji Green

For the engine itself, I have a fair idea what to do about the black cover, but what are your thoughts on the aluminium oxidisation? I thought of going over it with hand held sandpaper but felt a bit extreme ?

1772891987095.png

1772892010885.png
 

Attachments

ChrisD

Zorg Legend
Joined
Nov 29, 2023
Points
76
Location
Vale of Evesham
Model of Z
M44
My engine looked a lot like yours. I went at it with wire wool and then Autosol polish. It looks like this now.
IMG_7121.jpeg
it’s not going to win any concours prizes but I’m not embarrassed to open the bonnet.
 

Matt Barnes

Zorg Guru (III)
Supporter
British Zeds
Joined
Jul 18, 2020
Points
128
Location
Portchester, Fareham
Model of Z
1998 BMW Z3 Individual 1.9 M44 B19
My engine looked a lot like yours

Thanks. If you go this route be mindful of the ferrous dust it creates. I’d recommend wearing gloves and regular vac’ing of the metal dust - especially around the open framed alternator.
will do..cheers Chris
 

AntStark

Zorg Guru (III)
Supporter
British Zeds
Joined
May 15, 2021
Points
143
Location
Hampshire
Model of Z
2002 3.0 Sport
Or something like this ? Maybe body colour ?
 

Matt Barnes

Zorg Guru (III)
Supporter
British Zeds
Joined
Jul 18, 2020
Points
128
Location
Portchester, Fareham
Model of Z
1998 BMW Z3 Individual 1.9 M44 B19
Or something like this ? Maybe body colour ?
ooooo a Fiji green rocker cover...hmmm
 

Andyboy

Zorg Guru (III)
Joined
Jun 2, 2019
Points
125
Location
SHEFFIELD
I need to replace the gasket so a good call...
When you do the cam cover gasket, you must also replace the oil pressure O ring at the front of the head - oil goes up the front gallery, into the cam cover and sprays oil down onto the cam. The seal goes hard with age and bleeds off oil pressure.

With the cover off, it's much easier to replace the plastic coolant stub on the back of the head as well. Two future proofing jobs.
 

Matt Barnes

Zorg Guru (III)
Supporter
British Zeds
Joined
Jul 18, 2020
Points
128
Location
Portchester, Fareham
Model of Z
1998 BMW Z3 Individual 1.9 M44 B19
When you do the cam cover gasket, you must also replace the oil pressure O ring at the front of the head - oil goes up the front gallery, into the cam cover and sprays oil down onto the cam. The seal goes hard with age and bleeds off oil pressure.

With the cover off, it's much easier to replace the plastic coolant stub on the back of the head as well. Two future proofing jobs.
thanks Andy, good info!.. the kit I looked at seemed to have loads of O rings in it so I guess that's why
 

Matt Barnes

Zorg Guru (III)
Supporter
British Zeds
Joined
Jul 18, 2020
Points
128
Location
Portchester, Fareham
Model of Z
1998 BMW Z3 Individual 1.9 M44 B19
well I've reached a milestone in that this is the last brake line to go on !... After purchasing the hand held flaring tool that @Mazza had, it was time to give it a crack. Dug out a failed rear trailing arm brake line by cutting off the bit that folded in on me. I used a vice VERY LIGHTLY, to the point if I let go the pipe would fall out. It was just to help straighten it, by rotating the pipe in the jaws and giving a gentle squeeze where needed.

1773500916970.png


used the pipe cutters to get a nice new end, and slid on a new 10mm union

1773501021611.png


For those that haven't used a hand held flaring tool, hopefully this will step you through it.

1773501102717.png


The forming head is specific to the pipe, so you' need to buy a different head for different size pipes. The top hat nut is a back stop that helps line up the end of the pipe to the vertical line...then you butt the brake pipe up to it. It also acts as a bit of quality control because if the pipe is buckled, it won't go through the Former.

1773501238936.png

1773501267146.png


Clamp down with a 10mm until it bottoms out

1773501335506.png


Then it's the bubble flare former as OP1

1773501386943.png


Then with a 17mm wind it down, while holding the handle obviously until it also bottoms out.

1773501466213.png


Then loosen the former, and the clamping nuts, remove one half of the Former and you have this .

1773501539073.png


et voila !!!!..very impressed with the outcome of that

1773501573142.png


So let's see if it lives up to the claim it's easy to do it on the car !

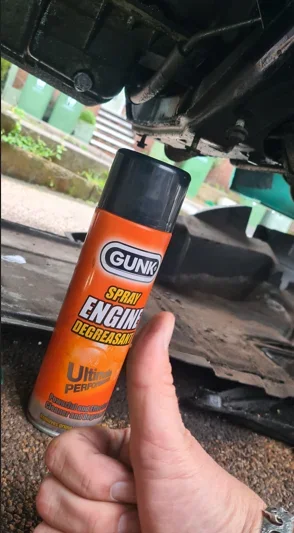
first cut and cleaned up the pipe which also got rid of the overspray that was really annoying me !!.... and yes ... I remembered the union !!

1773501728974.png
1773501749845.png


Then it was rinse and repeat but on the car this time

1773501836633.png
1773501860508.png


and there we go.... job done !....notice I too suffered the sheared off connector box studs.. though I have the @Mazza solution for that..

1773501939653.png


my only word of caution with that tool, is that when finished, you have to take it apart. So if you're working on gravel or something similar be careful to eye all the pieces.
 

Matt Barnes

Zorg Guru (III)
Supporter
British Zeds
Joined
Jul 18, 2020
Points
128
Location
Portchester, Fareham
Model of Z
1998 BMW Z3 Individual 1.9 M44 B19
No much today, but I thought I'd tidy up the strut towers a bit and the front valence

rubbed down with scotchpad then degreased the area. Tried to unscrew the negative battery charge terminal but it wouldn't budge, and I did NOT want to shear that off.... so taped it up. then wrapped a towel round the bottom of the tower. (yes that is dirt on the left, not rust)

1773587298006.png


Same the other side, just a light dusting of filler Primer

1773587355044.png


and prepare yourselves for some precision masking =)) =))

1773587436682.png


There were patches of rust bubbles along the valence, so I got the finger sander out and took the areas back to bare metal, including around the right bonnet stop, technique for masking that area was a cupped hand.... =))=))

The primer is very forgiving and has quite a narrow fan. This was enough to do the job..

1773587671787.png


Next weekend that'll all get a layer of top coat, and a bit of lacquer.

People often ask why my restoration is taking so long.... I have no idea (while he rubs down and paints the wheel arch connector boxes inside and out ) :whistle::whistle:

1773587906518.png


Whilst had the cover off I thought I'd try @Mazza s solution for the connector box studs. Drill bit, tap and two sacrificial bolts (sssssh I haven't told them yet)

1773587999494.png


Had trouble getting purchase so had to start off with a 1mm drill bit and work my way up.... just getting going and felt the rain drops

1773588128297.png


So that left me with no choice except....... GIN & TONIC

1773588248600.png
 
Top